With Challenge Battles coming soon as a part of the Expansion pass, players will want to make sure they’re prepared, either to grind gear or test out strategies. Luckily, Xenoblade Chronicles 3 already offers a great amount of challenge in the main game. Superbosses are the toughest foes you can find in the world of Aionios. This guide will tell you where to find them and give some quick and basic tips to beat them.
Mild spoilers ahead, but to be fair, you’ll only need this information when you’re in the post-game.
In previous games, superbosses could be defined as Unique Monsters whose level is higher than level 99, the maximum level for players. As a result, players will always be underlevelled compared to the enemy. However, that definition doesn’t exactly apply to the superbosses in Xenoblade Chronicles 3, as they’ve been given a new mechanic this time around. For starters, one superboss starts out at level 95, and one Unique Enemy is at level 102 but does not count as a superboss.
This time around, superbosses are determined by the unique “Challenge” gimmick. After beating the boss for the first time and interacting with its grave, you can rematch it as usual with the “retry” button. Superbosses have an extra option, namely ‘Challenge’. If the boss is ‘challenged’, it will have a higher level than last time. This can be repeated up to 10 times, represented by a star next to ‘level’. This makes the superbosses highly replayable and allows you to push builds to their limits. If you want, you can still fight the boss at their original level by selecting ‘retry’ at the Named Grave.
Every time you slay a superboss for the first time, you’ll gain info on a discussion topic called “Aionios’ Strongest”. You need to complete this topic and then discuss it to unlock the final superboss. However, there are only 4 superbosses, not counting the final one. The 5th piece of intel is instead found in the City, by overhearing 2 people talking. Personally, I’ve found it in the northern section of the City, close to the “Module Warehouse”.
With the introductions out of the way, let’s get started with introducing this rogue gallery of superbosses.
As mentioned before, not all superbosses are level 100 or higher this time around, and Kilocorn Grandeps proves it. Despite his level, it’s still a tough fight. Luckily, finding this beast shouldn’t be difficult. Simply head west from the “Saffronia Tree” in the Fornis Region, and you’ll find it there.
Don’t underestimate the lowest level superboss. It has good AOE coverage with Horn Dance, allowing it to easily damage all party members. It also has access to the debuffs Chill (damage over time) and ‘Evasion Down’. Lastly, its high block rate can make dealing damage a pain.
As such, ensure you have enough AOE healing capability to recover from Horn Dance and Chill. Debuff resistance and cleansing will also come in useful, especially when using an evasion tank like Zephyr or Lone Exile. Lastly, use Maximum Voltage or Yumsmith to prevent your attacks from getting blocked.
For the second boss, it’s time to return to the Aetia Region, but with a detour. While Perilwing Ryuho is found in Melnath’s Shoulder, you can’t reach it until Chapter 6. Go to Captocorn peak, then head south from Colony Omega. Continue on your path to Cooley Lake. That’s where the second superboss will be flying around. It can be a pain to lure in because it constantly flies around though. I’ve found it the easiest to fight it either in the middle of the lake or on the south coast.
This bird can easily ruffle your feathers. Just like Grandeps, it can inflict chill onto your party members, but also reduce accuracy using Hyperion Ray. It’s also quite agile. However, its most powerful art, Stratospheric Launch, is capable of blowing you back and, well, inflicting Launch. It’s not the best at AOE attacks though, so put your best Defender in front. Just like before, have ways to prevent or cure debuffs, and maybe even some Launch resistant accessories.
Remember that there was a Unique Monster that lacked the ‘Challenge’ mechanic, yet its level is higher than 100? That’s not exactly true, as the King Kings are a two-in-one deal. They can only be fought together, even when fighting them again through the Named Grave. They’re technically not superbosses, but they’re still a challenge.
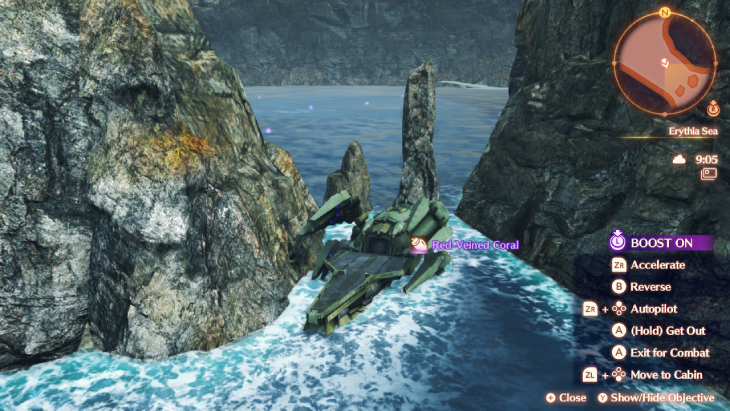
The King-Kings can be found in Malevolent Hollow, a cave south of Erythia Sea. Simply take your boat east of Vinisog Holm Camp to Searing Strand. If you’ve done Isurd’s Ascension Quest, you’ve already visited this area before. Then, you’ll need to have Segiri unlocked as a Hero to be able to walk through poison. You can read how to unlock her in our Hero Guide. Eventually, you’ll enter the cave where a lot of high-level enemies live. At the end, the Kings await your arrival.
Conqueror Deepwan and King Krawkin dominate you through sheer numbers. Not only can the former inflict Target Lock on the entire party, but the latter can summon reinforcements. Make use of AOE attacks to clean up the reinforcements, or prevent/cure Target Lock to easily switch targets. Make use of combos to lock down monsters, preventing them from attacking. Lastly, don’t rely on Ouroboros, as Interlinking is prevented in this cave. Not even Ouroboros Orders will trigger.
The next proper superboss is also found in a cave, this time in the lower Maktha Wildwood. You should have reached this part of the Pentelas region during the quest “The Ultimate Vessel”, a part of the main story. In particular, you’ll want to head southeast of the entrance of the region. Head through the cave, fighting a different level 96 Unique Monster along the way. Progress further to wake the sleeping dragon.
We’ve emphasized the purpose of curing or preventing debuffs from earlier bosses, but that goes double for this scaly beast. It specializes in afflicting party members both Blaze and Bleed, and AOE at that. It can also buff itself with Attack Up and even Invincible. Consider using Troubadour’s Art that can remove buffs.
It’s time for the last superboss before unlocking Aionios’ strongest being. Return to the Cadensia region, directly south of Colony 15, or east of Cape Arcaphor. Seek out an inlet that’s blocked by some rocks, preventing your ship from sailing past. You’ll need to swim for the rest of the way. This is when you enter the Aegis Sea, where this sea monster awaits.

Levialord Empireo awaits beyond these rock. It won’t be able to wreck your boat because the Bravery can’t enter the Aegis Sea.
This shiny Gyrados is not the hardest superboss, but the most annoying one. Just like the others, he can apply debuffs; mainly Ether Defense Down and Shackle Block. However, this is one big man, so getting your Attackers to the back is incredibly annoying. Levialord Empireo also has some AOE attacks, so if an Attacker dies, Healers need to cover a great distance to revive them. This can easily put you in an even worse spot. Consider using multiple Healers and/or avoid giving your characters back positionals. Lastly, the foam in the water makes it visibly difficult. If you want, you can get an item from the Nopon Coin X-change that increases art recharge in water.
Seraphic Ceratinia is the final superboss to face. It has its own introductory cutscene AND its own battle track. Lastly, it can reach level 200 through the “Challenge” mechanic. It indeed can be considered Xenoblade Chronicles 3’s true final boss. As mentioned earlier, it can only be unlocked after discussing the “Aionios’ Strongest” topic, which can be completed after getting info from the City and beating the other 4 superbosses. After doing that, head to the Cavity, which is where the City used to be before the events at Agnus Castle. If you’ve done the Ascension Quest of one of the post-game Heroes, you’ve already been there. Climb down the hill to the valley, to the back. Watch the cutscene, then it’s time to fight Aionios’ strongest.
Seraphic Ceratinia requires all the skills you’ve learned up to this point. It has a high block rate and high agility at higher levels. It can easily change its target, and its auto attacks are capable of one-shotting Attackers and Defenders, so use your strongest Defenders to hold aggro, and have enough Healers to revive. Not only that, it can weaken the resistances of all your party members, then hit hard with AOE attacks. If you thought that was bad, it has the Art Ultra Play Bite. It can inflict Break, but also Doom. And if you don’t know, if Doom isn’t blocked or resisted, it instantly kills the target. Bring nothing but your A-game to this battle.
A few final non-combat tips regarding Seraphic Ceratinia. First off, it’s the monster with the highest drop rate of Nopon Coins, both silver and golden. As such, it’s a renewable source of both types of Nopon Coins. Make sure to use a Burst-oriented team to get as much as possible, because the drop rate is still low. Lastly, fighting this boss over and over is my personal favorite way to grind CP and level up classes, as you get more CP by fighting higher level enemies. As long as you have some fully optimized characters and enough experience, it’s plausible to beat it using suboptimal team compositions at its base level.
If you still aren’t ready to test your mettle, here are some general strategies and combos you can use to break the game. Please only read this as a last resort, as it’s way more fun to come up with strategies on your own. Nevertheless, these are some of the best Heroes, Master Arts and Classes to clear the post-game.
Noah’s Class has a Skill called Inspirit, that increases damage dealt by 150% when fighting a Unique Monster or boss. This is a massive damage buff that always applies during superboss fights. This makes Swordfighter one of the highest damaging classes, especially with other multipliers like Power Charge or during Chain Attacks. Air Slash has a massive power multiplier, allowing it to do tons of damage, especially with the right set-up. One such set-up is…
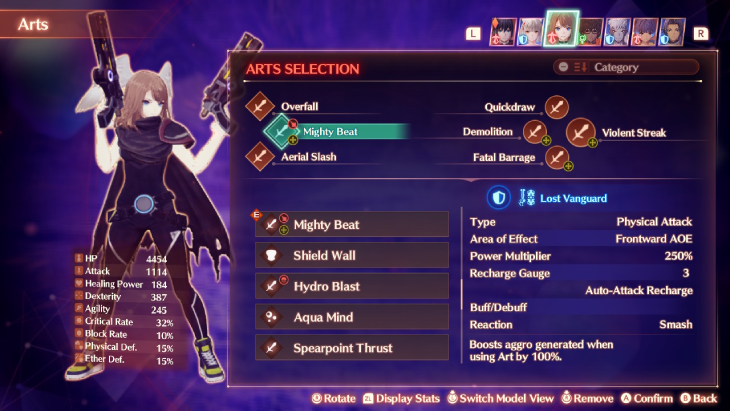
Not only do you get a damage boost when attacking Launched enemies, but the combo finisher Smash also does tons of damage, especially during Chain Attacks. It can only be used with 2 Arts. The first one is Saber Strike, Flash Fencer’s Talent Art, which can’t be used during Chain Attacks. However, Lost Vanguard’s Mighty Beat is useable, and it’s a Master Arts. As such, Kevesi can equip it and fuse it with their own Arts. Equip it to your strongest Kevesi Attacker, and fuse it with their strongest Art. Launch the enemy, then use your Smash to do tons of damage (especially with Power Charge, or the accessory to increase Smash damage). However, the superbosses have high Break resistance, so pulling off a Launch won’t be easy. If only there was a character that makes Breaking easier…

You can use guns to Smash characters to the ground. Doesn’t make much sense, but it’s very effective.
You know where this is going. Ogre’s Skill Fury Smash increases reaction success rate by 45 percentage points at rank 20. You can equip Yumsmith’s Master Art Flashback to Ogre, which gives it access to a low cooldown Break Art. This allows your team to pretty much spam combo’s, both Burst and Smash, with the right set-up.
This one should be obvious. As mentioned in our Hero guide, Signifers can give themselves random buffs with Aureole, then distribute them with their team with Resonant Flag. With a good set-up, you can give a huge amount of buffs to your allies. Let’s go over some extra tips with Signifer:
Resonant Flag is the Art that gives all current buffs on a Signifer to allies. If it’s fused with Shadow Eye, it guarantees that you give Attack Up to all your allies. It’s a reliable way to buff your allies, especially during Chain Attacks. Considering that this combination doesn’t deal damage, it doesn’t consume the Power Charge buff. Instead, it’s given to all allies when using the Resonant Flag, while the Signifer keeps the buff. It allows you to easily refresh Power Charge on all your allies.
Lastly, the 2 pillarstones of the Signifer Class, Aureole and Resonant Flag, are Master Arts. As such, you can use it to turn every Kevesi Class into a budget-Signifer. You can even level up Signifer to rank 20 to allow every Class to use its Talent Art Cry Of Faith. Resonant Flag in particular works well with Class that can also buff itself, like Flash Fencer (Power Charge) and Guardian Commander (Awakening).
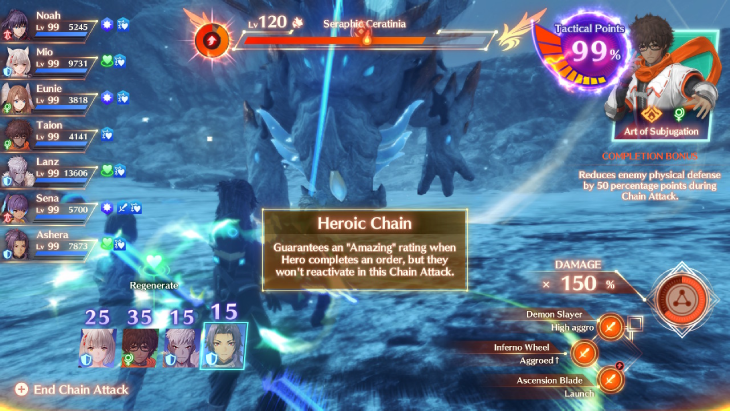
Heroes are inherently less powerful than the Ouroboros, as they can’t use Master Skills and Arts. But as mentioned in our Chain Attack guide, they have exclusive bonusses in their Heroic Chains and Chain Orders. In this regard, Ashera is undoubtedly the best Hero during Chain Attacks. Her Chain Order gives a massive boost to the damage multiplier, and buffs the entire team with Power Charge. You can refresh this infinitely with Signifer. However, Ashera’s Heroic Chain is where she shines. If she finishes an Order, it’s guaranteed to get an Amazing Rating, regardless of her TP. However, she can’t be reactivated afterward. This is a good thing because as mentioned earlier, Ouroboros are more powerful. If you use 3 characters in the first round, then finish with Ashera, all 3 characters are reactivated, with more TP and a higher damage multiplier.

Ashera’s unique properties make your Chain Attacks deal tons of damage. Lone Exile is a good class too.
You might expect Noah’s and Sena’s Ouroboros Orders to be the most powerful, thanks to them being Attackers and piercing Defense. In that regard, you’ll expect Eunie and Taion’s to be the weakest, as they’re the supporters. You’ll then be surprised to learn that our favorite Healers pack the most punch. Eunie’s Soul Tree has a skill called Shared Blessing, which increases damage based on the number of buffs active on allies, which can be given to Taion using Soul Link. With a Signifer, this buff is incredibly easy to max out, making them easily do the most damage with their Ouroboros Orders. Thank you, Fiona.